# Vue.js + Firebase로 페이스북(facebook) 로그인 연동하기
우선, 기존의 파이어베이스 콘솔에서 Authentication의 로그인 방법으로 들어가자
우리는 이메일/비밀번호를 활성화 시켜서 회원가입과 로그인을 가능하도록 구현했었다.
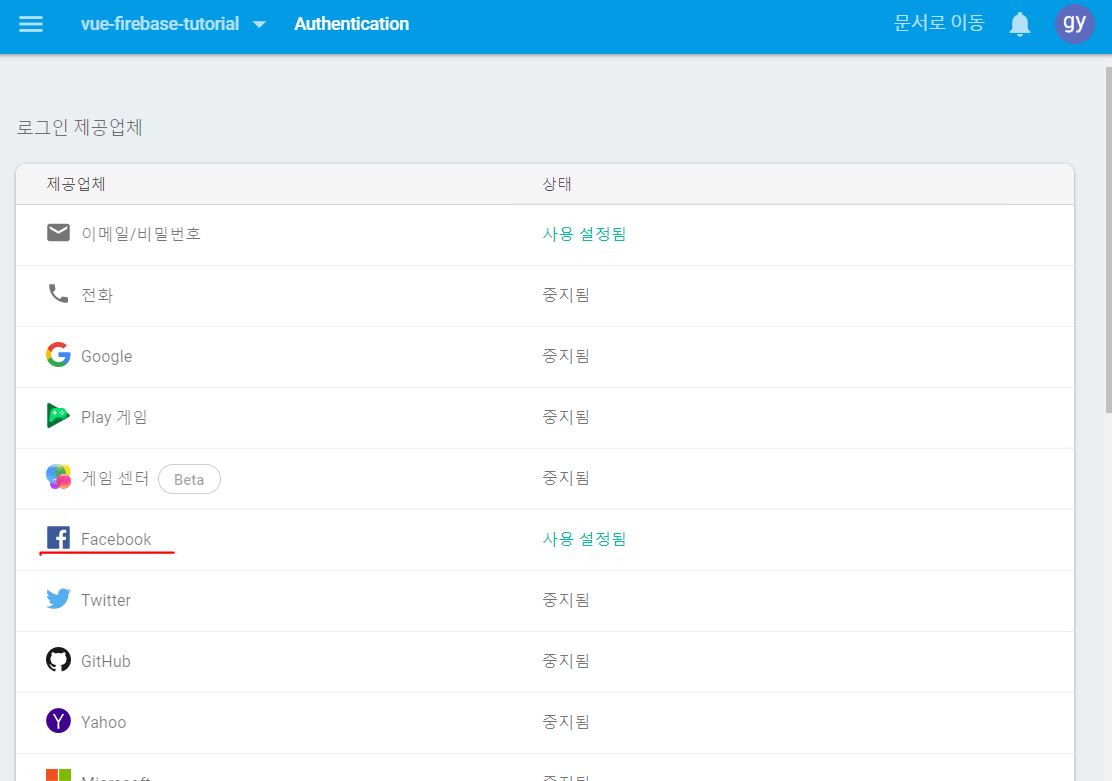
위 사진처럼 페이스북도 상태를 사용으로 만들어야 한다.

아래에 나오는 OAuth 리디렉션 URI를 복사하고, facebook for developers로 이동한다.
Facebook for developers 링크 (opens new window)
해당 사이트에서 페이스북 아이디를 통해 로그인이 가능하다.
앱을 새로 하나 생성하자. 앱 이름은 알아서 정하면 된다.
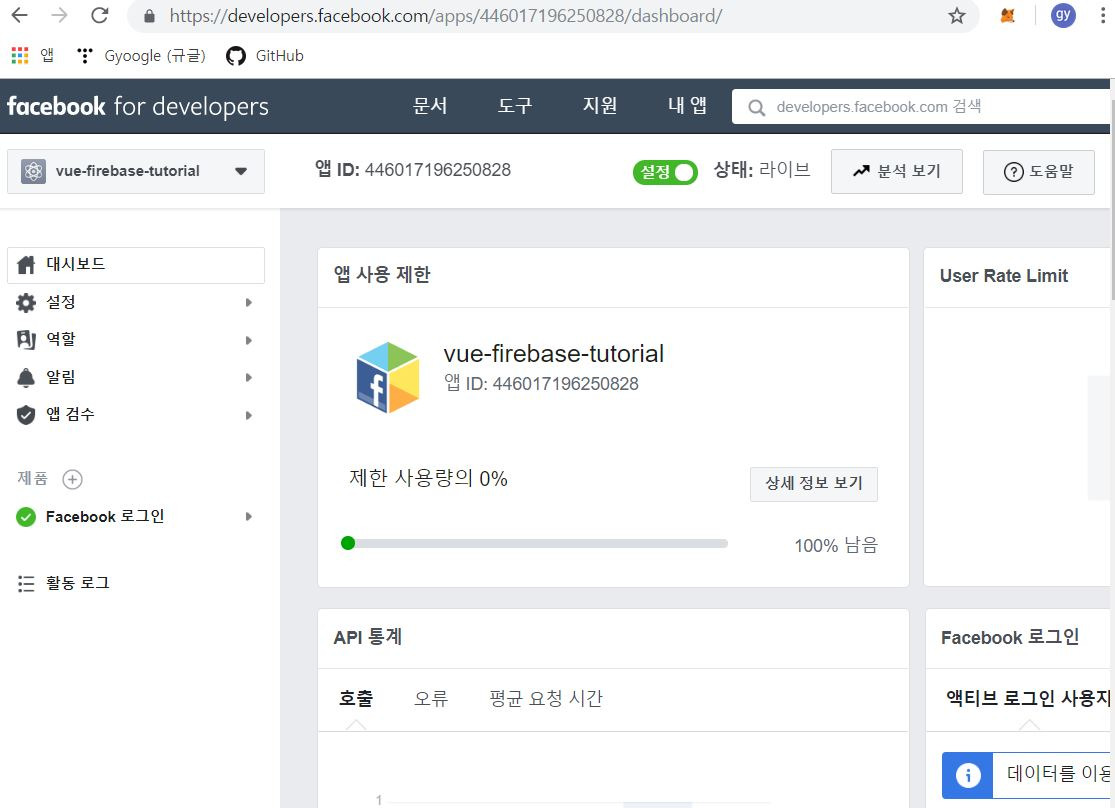
앱을 생성하면 대시보드 화면이 나올 것이다.
(현재 스크린샷은 라이브 상태로 되어있지만, 처음 만들었을 때는 개발모드 상태일 것이다.)
페이지를 아래로 내려보면 제품 추가 항목이 존재한다.
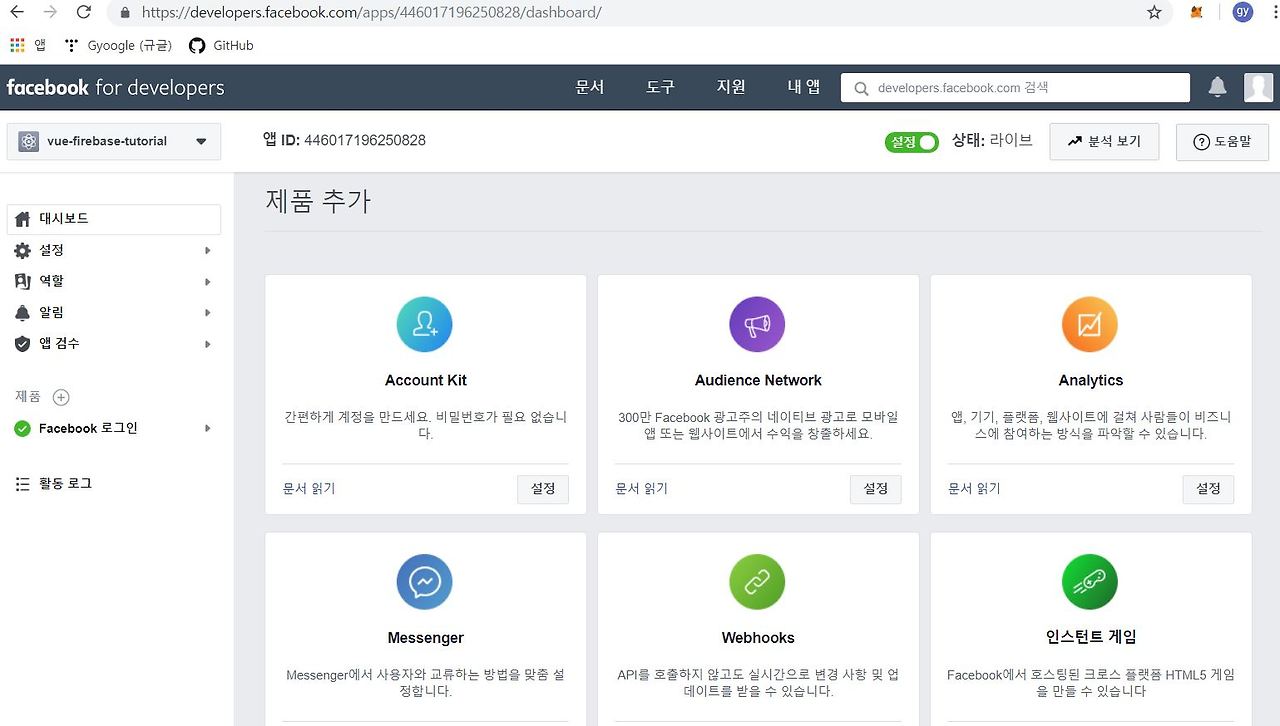
이중에 'Facebook 로그인'항목이 우리가 필요한 것이다.
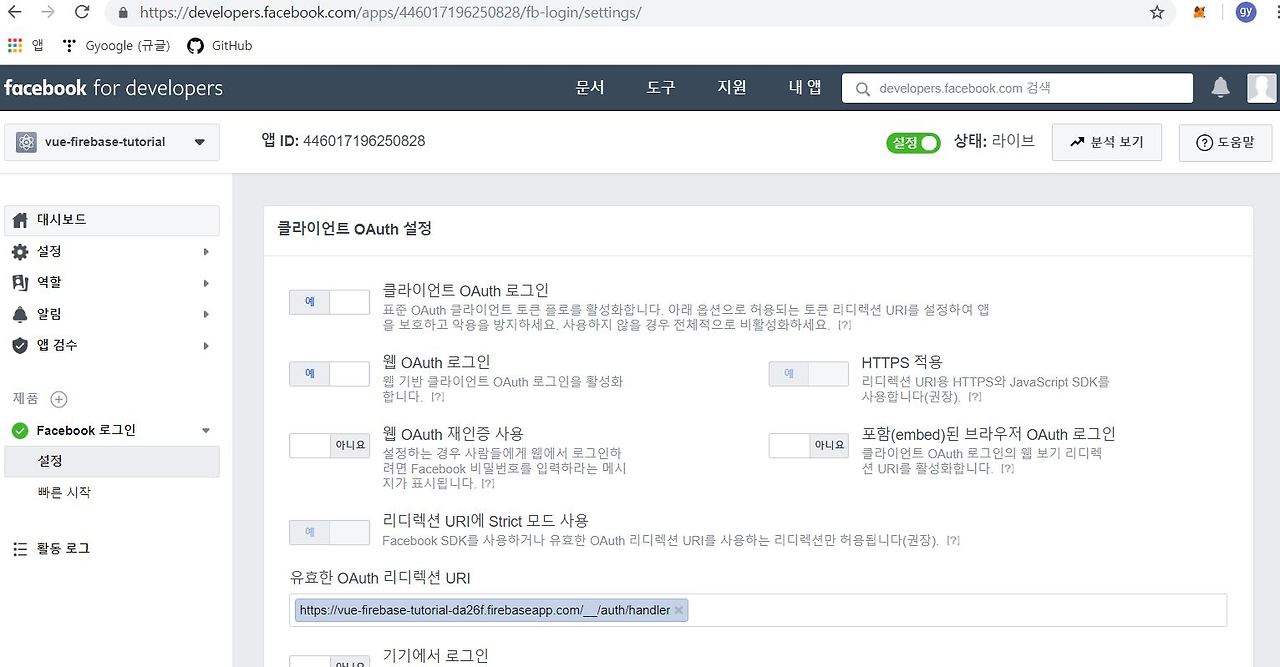
유효한 OAuth 리디렉션 URI의 공란에 아까 파이어베이스에서 복사한 URI를 붙여넣기 하고 저장해주면 된다.
이제 우리 Facebook 앱을 배포시에도 정상 작동할 수 있도록 공개상태로 전환시켜야한다.
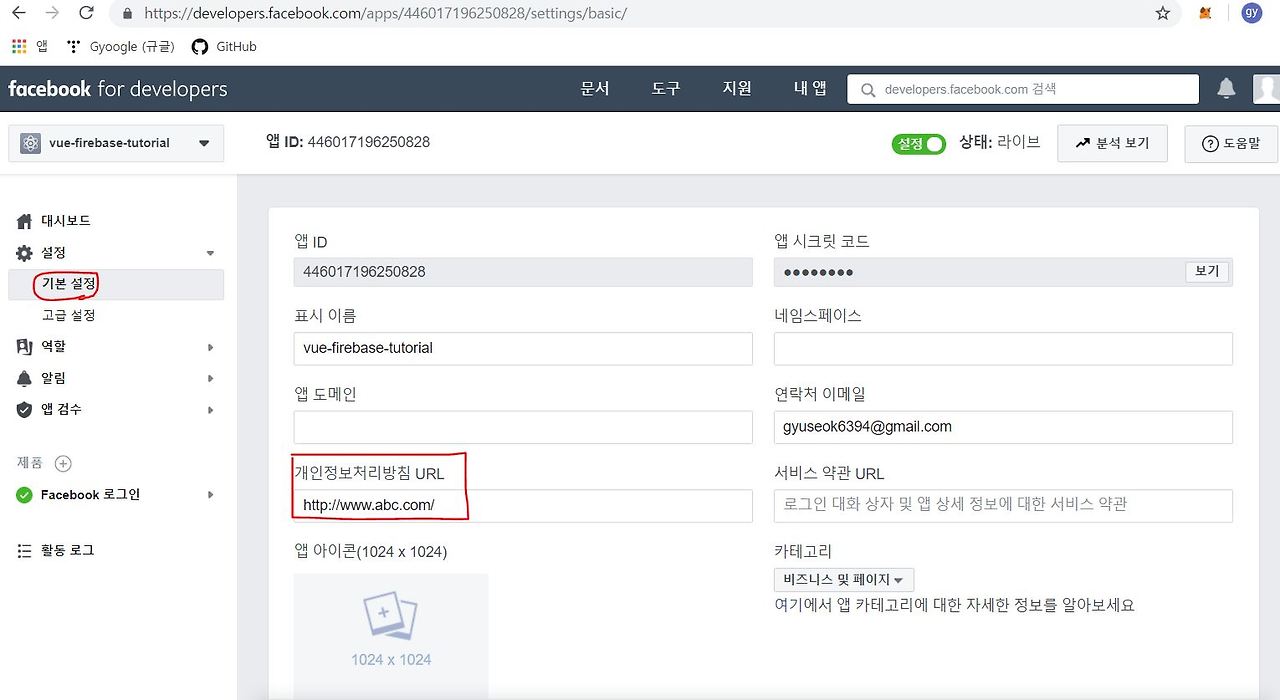
설정 → 기본 설정으로 들어가면, 다음과 같은 화면이 나올 것이다.
여기서 '개인정보처리방침 URL'을 등록해야만 앱을 공개상태로 바꿀 수 있다.
현재는 연습단계이므로, 아무 url이나 작성하고 저장한다.
이제 중앙 위쪽에 설정을 키면, 앱이 정상적으로 실행될 것이다!
이제 설정창에 존재하는 앱 ID와 앱 시크릿 코드를 파이어베이스에서 페이스북 연동을 하기 위해 사용할 것이다.
(시크릿 코드는 비밀번호를 한번더 입력하면 볼 수 있다.)
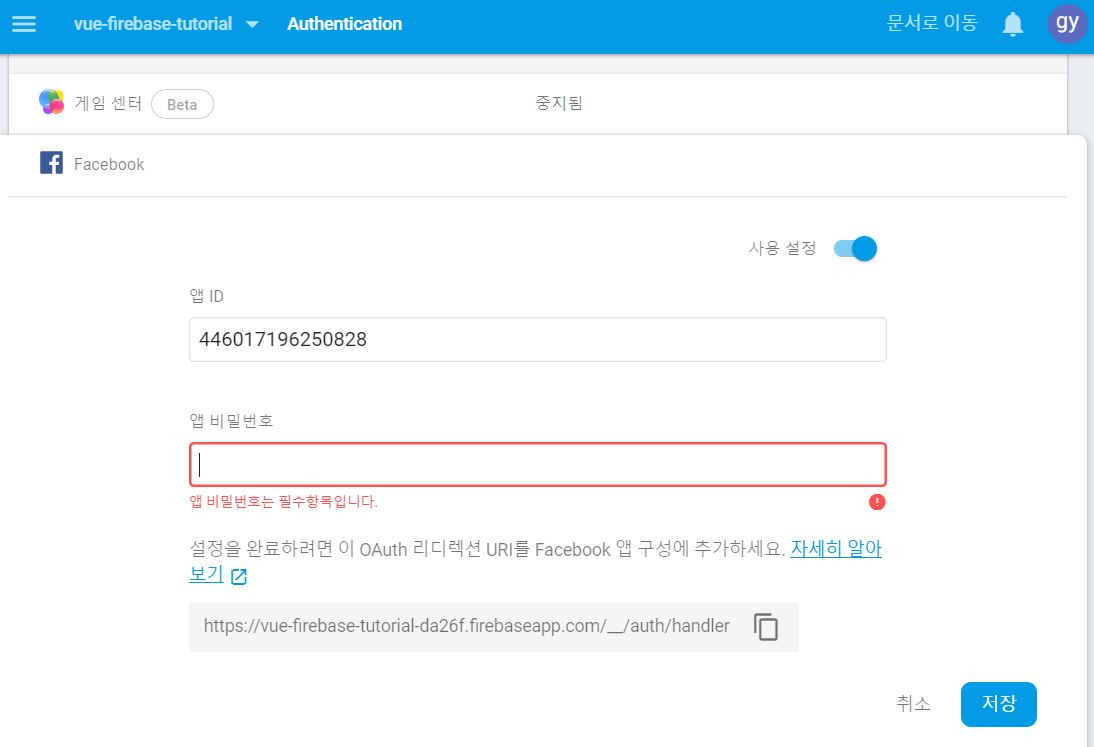
다시 파이어베이스로 돌아가서, 앱ID와 앱 비밀번호를 입력하자
이제 Facebook 사용 설정이 모두 끝났다.
코드로 파이어베이스를 로그인 화면에서 불러오는 메소드를 작성해주면 된다.
# Login.vue의 템플릿 부분
<template>
<div class="login">
  <h3>로그인</h3>
  <input type="text" v-model="email" placeholder="email"><br>
  <input type="password" v-model="password" placeholder="password"><br>
  <button v-on:click="login">로그인</button>
  <p>또는 페이스북 로그인 <br>
    <button class="social-button" v-on:click="facebookLogin">
      <img alt="Facebook Logo" src="../assets/facebook-logo.png">
    </button>
  </p>
  <p>만약 계정이 없다면, <router-link to="/signup">회원가입</router-link>을 먼저 진행해주세요!</p>
</div>
</template>
기존 화면에서 페이스북 로그인 부분을 추가했다.
인터넷에서 페이스북 로고 이미지(facebook-logo.png)를 다운받아서, 프로젝트 폴더의 src/assets에다가 추가하자.
# 페이스북 로그인 연동 script
<script>
import firebase from 'firebase'

var provider = new firebase.auth.FacebookAuthProvider()
provider.addScope('public_profile')
provider.setCustomParameters({
  'display': 'popup'
})

export default {
  name: 'login',
  data() {
    return {
      email: '',
      password: ''
    }
  },
  methods: {
    login() {
      ...
    },
    facebookLogin() {
      firebase.auth().signInWithPopup(provider).then((result) => {
        var token = result.credential.accessToken
        var user = result.user

        console.log("token : " + token)
        console.log("user : " + user)

        this.$router.replace('welcome')

      }).catch((err) => {
        alert('에러 : ' + err.message)
      })
    }
  }
}
</script>
파이어베이스에서 facebookauth를 불러오고, provider 변수로 작업한다.
setCustomParameters의 display를 popup으로 줘서, 버튼을 클릭했을 때 팝업창으로 페이스북 로그인이 진행되도록 한 것이다.
버튼에 작성한 facebookLogin 메소드를 firebase.auth().signInWithPopup로 가져와서 페이스북 로그인을 진행할 수 있다.
# Login.vue의 전체 소스코드
<template>
<div class="login">
  <h3>로그인</h3>
  <input type="text" v-model="email" placeholder="email"><br>
  <input type="password" v-model="password" placeholder="password"><br>
  <button v-on:click="login">로그인</button>
  <p>또는 페이스북 로그인 <br>
    <button class="social-button" v-on:click="facebookLogin">
      <img alt="Facebook Logo" src="../assets/facebook-logo.png">
    </button>
  </p>
  <p>만약 계정이 없다면, <router-link to="/signup">회원가입</router-link>을 먼저 진행해주세요!</p>
</div>
</template>

<script>
import firebase from 'firebase'

var provider = new firebase.auth.FacebookAuthProvider()
provider.addScope('public_profile')
provider.setCustomParameters({
  'display': 'popup'
})

export default {
  name: 'login',
  data() {
    return {
      email: '',
      password: ''
    }
  },
  methods: {
    login() {
      firebase.auth().signInWithEmailAndPassword(this.email, this.password).then(
        (user) => {
          this.$router.replace('welcome')
        },
        (err) => {
          alert('에러 : ' + err.message)
        }
      );
    },
    facebookLogin() {
      firebase.auth().signInWithPopup(provider).then((result) => {
        var token = result.credential.accessToken
        var user = result.user

        console.log("token : " + token)
        console.log("user : " + user)

        this.$router.replace('welcome')

      }).catch((err) => {
        alert('에러 : ' + err.message)
      })
    }
  }
}
</script>

<style scoped>
.login {
  margin-top: 40px;
}

input {
  margin: 10px 0;
  width: 20%;
  padding: 15px;
}

button {
  margin-top: 20px;
  width: 10%;
  cursor: pointer;
}

p {
  margin-top: 40px;
  font-size: 15px;
}

p a {
  text-decoration: underline;
  cursor: pointer;
}

.social-button {
  width: 75px;
  background: white;
  padding: 10px;
  border-radius: 100%;
  box-shadow: 0 2px 4px 0 rgba(0, 0, 0, 0.2);
  outline: 0;
  border: 0;
}

.social-button:active {
  box-shadow: 0 2px 4px 0 rgba(0, 0, 0, 0.1);
}

.social-button img {
  width: 100%;
}
</style>
style을 통해 페이스북 로그인 화면도 꾸민 상태다.
이제 서버를 실행하고 로그인 화면을 보자

페이스북 로고 사진을 누르면?
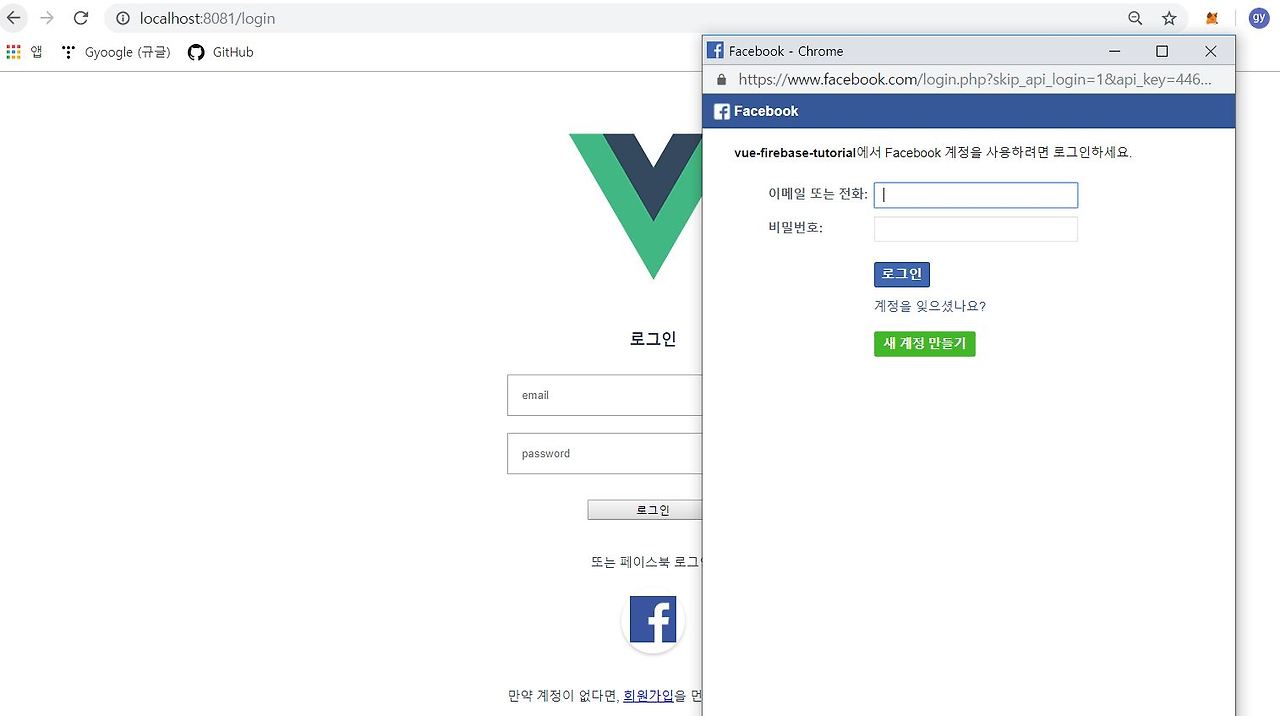
페이스북 로그인 창이 팝업으로 뜨는걸 확인할 수 있다.
이제 자신의 페이스북 아이디와 비밀번호로 로그인하면 welcome 페이지가 정상적으로 나올 것이다.
마지막으로 파이어베이스에 사용자 정보가 저장된 데이터를 확인해보자
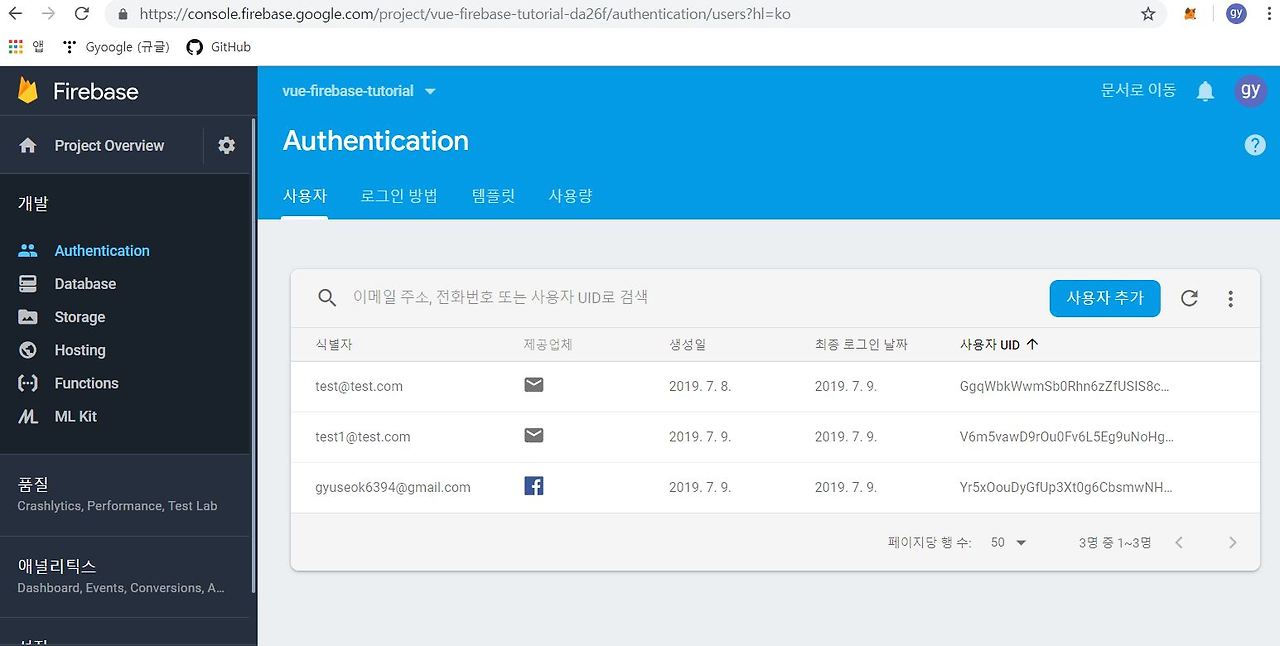
페이스북으로 로그인한 사람의 정보도 저장되어있는 모습을 확인할 수 있다. 페이스북으로 로그인한 사람의 이메일이 등록되면 로컬에서 해당 이메일로 회원가입이 불가능하다.
위처럼 간단하게 웹페이지에서 페이스북 로그인 연동을 구현시킬 수 있고, 다른 소셜 네트워크 서비스들도 유사한 방법으로 가능하다.